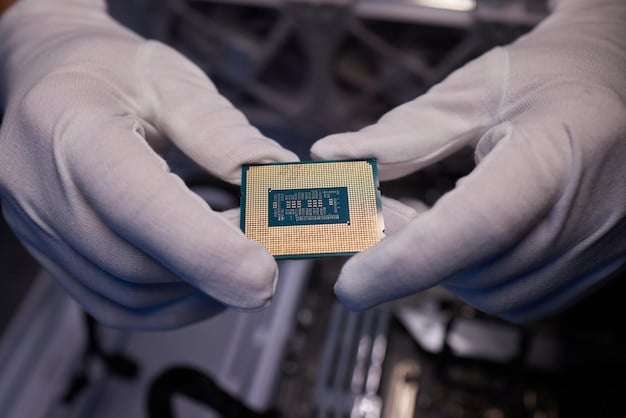
Beginner’s Guide: Maximize Gaming PC Speed with M.2 NVMe SSD Installation

Installing and configuring an M.2 NVMe SSD can significantly boost your gaming PC’s speed, offering faster boot times, quicker game loading, and improved overall system responsiveness, making it a crucial upgrade for any gaming enthusiast.
Ready to supercharge your gaming rig? This beginner’s guide: installing and configuring M.2 NVMe SSDs for maximum gaming PC speed will walk you through every step, ensuring a smooth upgrade and a noticeable performance boost.
Understanding M.2 NVMe SSDs
M.2 NVMe SSDs have revolutionized storage solutions, especially for gaming PCs. Unlike traditional SATA SSDs, NVMe (Non-Volatile Memory Express) SSDs utilize the PCIe bus, offering significantly higher data transfer speeds. This translates to faster loading times, quicker boot sequences, and a more responsive gaming experience.
Before diving into the installation process, let’s clarify what makes M.2 NVMe SSDs stand out and why they are essential for any modern gaming setup.
The Speed Advantage
The primary benefit of an M.2 NVMe SSD is its speed. Traditional SATA SSDs are limited by the SATA interface, typically around 500-600 MB/s. NVMe SSDs, on the other hand, can reach speeds of up to 7000 MB/s or even higher, depending on the generation and manufacturer. This speed difference is noticeable in almost every task, from launching games to transferring large files.
Form Factor and Compatibility
M.2 refers to the form factor, which is a small, rectangular card that plugs directly into the motherboard. NVMe refers to the communication protocol used to transfer data. It’s crucial to ensure your motherboard supports M.2 NVMe SSDs. Most modern motherboards have one or more M.2 slots that support NVMe, but it’s always a good idea to check the specifications.
- Check Your Motherboard: Confirm that your motherboard supports M.2 NVMe SSDs.
- Identify the M.2 Slot: Locate the M.2 slot on your motherboard, usually labeled near the chipset.
- Consider the Size: M.2 SSDs come in different lengths, such as 2280 (22mm wide, 80mm long). Ensure your motherboard supports the size of the SSD you intend to install.
In summary, understanding the speed advantages and ensuring compatibility are the first steps in embracing M.2 NVMe SSDs for your gaming PC.
Preparing for Installation
Proper preparation is key to a successful M.2 NVMe SSD installation. This involves gathering the necessary tools, understanding ESD precautions, and backing up your data to prevent any potential data loss.
Let’s walk through the essential steps to ensure you’re fully prepared before you even touch any hardware.
Tools and Materials Needed
Before you start, make sure you have the following tools and materials:
- Screwdriver: A small Phillips-head screwdriver is essential for securing the M.2 SSD to the motherboard.
- Anti-Static Wrist Strap: Protect your components from electrostatic discharge (ESD) by wearing an anti-static wrist strap.
- Motherboard Manual: Keep your motherboard manual nearby to refer to the M.2 slot location and any specific instructions.
- Backup Drive: Back up all important data before making any hardware changes to avoid data loss.
ESD Precautions
Electrostatic discharge (ESD) can damage sensitive electronic components like SSDs and motherboards. Always take precautions to prevent ESD:
- Wear an Anti-Static Wrist Strap: Connect the wrist strap to a grounded metal surface.
- Touch a Grounded Metal Object: Before handling any components, touch a grounded metal object like the computer case.
- Work on a Non-Static Surface: Avoid working on carpets or other surfaces that can generate static electricity.
- Handle Components by the Edges: Always handle components by their edges to avoid touching sensitive parts.

By taking these preparatory steps, you minimize the risk of damaging your components and ensure a smoother installation process. Always prioritize safety and data protection before making any hardware changes.
Step-by-Step Installation Guide
Now that you’re prepared, let’s move on to the actual installation of the M.2 NVMe SSD. This involves locating the M.2 slot, inserting the SSD, and securing it in place.
Follow these steps carefully to ensure a successful installation.
Locating the M.2 Slot
The M.2 slot is usually located near the chipset or CPU socket on your motherboard. Refer to your motherboard manual to find its exact location. The slot is typically horizontal and has a small screw standoff nearby.
Here’s what you should look for:
- Refer to the Manual: Consult your motherboard manual for the M.2 slot’s precise location.
- Identify the Key: M.2 slots have different “keys” (notches) to support different types of devices. NVMe SSDs usually use an M-key or B+M key.
- Check for Heatsinks: Some motherboards come with pre-installed heatsinks over the M.2 slot to dissipate heat. You may need to remove this before installing the SSD.
Inserting and Securing the SSD
Once you’ve located the M.2 slot, follow these steps to insert and secure the SSD:
- Align the SSD: Align the notch on the M.2 SSD with the key in the M.2 slot.
- Insert at an Angle: Insert the SSD into the slot at a slight angle (around 20-30 degrees).
- Push Down: Gently push the SSD down until it lies flat on the motherboard.
- Secure with Screw: Use the small Phillips-head screwdriver to secure the SSD with the screw that came with your motherboard. Be careful not to overtighten.
Remember to handle the SSD with care and avoid touching the gold connectors. A secure installation ensures that the SSD will function correctly and reliably.
Configuring the BIOS/UEFI Settings
After installing the M.2 NVMe SSD, you need to configure the BIOS/UEFI settings to ensure the system recognizes and utilizes the new drive. This involves checking the boot order and enabling NVMe support if necessary.
Let’s explore the BIOS/UEFI settings that need adjustment.
Accessing the BIOS/UEFI
To access the BIOS/UEFI settings, restart your computer and press the designated key during startup. This key varies depending on the motherboard manufacturer but is often Del, F2, F12, or Esc. The startup screen usually displays which key to press.
Here are some common keys for different manufacturers:
- ASUS: Del or F2
- MSI: Del
- Gigabyte: Del or F12
- ASRock: Del or F2
Checking Boot Order
Once in the BIOS/UEFI, navigate to the boot settings. Ensure that the M.2 NVMe SSD is listed as a boot option. If you want to boot from the new SSD, set it as the primary boot device.
You can also adjust the boot order to prioritize the M.2 NVMe SSD, ensuring faster boot times:
- Navigate to Boot Options: Look for a section labeled “Boot Order,” “Boot Priority,” or similar.
- Select the M.2 SSD: Choose the M.2 NVMe SSD as the first boot device.
- Save Changes: Save the changes and exit the BIOS/UEFI. Your computer will now attempt to boot from the SSD.

Proper BIOS/UEFI configuration is crucial for your system to recognize and utilize the M.2 NVMe SSD. Be sure to save your changes before exiting to ensure they take effect.
Installing the Operating System and Drivers
With the M.2 NVMe SSD installed and recognized by the BIOS/UEFI, the next step is to install the operating system and necessary drivers. This will allow your system to fully utilize the new SSD’s capabilities.
Let’s delve into the process of installing the OS and drivers for optimal performance.
Clean Installation vs. Cloning
You have two main options for getting your operating system onto the M.2 NVMe SSD:
- Clean Installation: This involves installing the OS from scratch using a USB drive or DVD. It’s the recommended method for a fresh start and the best performance.
- Cloning: This involves copying your existing OS and data from another drive to the M.2 NVMe SSD. While faster, it can sometimes carry over old issues.
For the best gaming experience, a clean installation is generally preferred.
Installing Drivers
After installing the operating system, you need to install the drivers for the M.2 NVMe SSD. Windows usually installs generic drivers, but manufacturer-specific drivers can provide better performance.
Verifying Performance
Once everything is set up, verify that the M.2 NVMe SSD is performing as expected. Use benchmarking tools to measure read and write speeds and compare them to the specifications of the SSD.
Optimizing Performance for Gaming
To maximize the performance of your M.2 NVMe SSD for gaming, you can make several optimizations. These include enabling TRIM, updating firmware, and managing storage effectively.
Let’s explore these optimizations to get the most out of your gaming rig.
Enabling TRIM
TRIM is a command that helps the SSD maintain its performance over time by telling it which data blocks are no longer in use. Ensure that TRIM is enabled in your operating system.
Keeping Firmware Updated
SSD manufacturers often release firmware updates that improve performance, fix bugs, and enhance compatibility. Check the manufacturer’s website for the latest firmware for your M.2 NVMe SSD and follow the instructions to update it.
Key Tips
Brief Description
⚡️ Speed Boost
The switch to M.2 NVMe SSD dramatically reduces load times for games and applications.
💾 Compatibility
Always check if your motherboard supports the M.2 NVMe SSD interface.
🔧 Installation
Handle the M.2 NVMe SSD carefully, avoiding any impacts on the components.
⚙️ Configuration
Verify in the BIOS/UEFI that the SSD is correctly recognized for optimal system performance.
Why Upgrade to NVMe SSD for Gaming PC
What is an M.2 NVMe SSD?
An M.2 NVMe SSD is a high-speed storage device that connects to your computer’s motherboard via an M.2 slot and uses the NVMe protocol for faster data transfer.
Where do I find the M.2 slot on my motherboard?
The M.2 slot is usually located near the CPU or chipset and is identified in your motherboard’s manual.
What should I do before starting the installation?
Before starting, ensure you have the necessary tools (screwdriver, anti-static wrist strap), and, most importantly, back up your data to prevent potential loss.
How do I ensure my system recognizes the new SSD in BIOS/UEFI?
After installing the SSD, enter your system’s BIOS/UEFI settings and check the boot order to ensure the M.2 NVMe SSD is listed and prioritized.
How can I optimize my SSD performance?
To optimize performance, enable TRIM in your OS, keep your SSD firmware updated, and manage your storage efficiently by avoiding unnecessary fills and defragments.
Conclusion
In conclusion, installing and configuring an M.2 NVMe SSD is a straightforward yet impactful upgrade for any gaming PC. By following this beginner’s guide, you can ensure a smooth installation, optimal configuration, and a significant boost in performance, ultimately enhancing your gaming experience.
Read more content


