How to Install Windows 11 on Your New Gaming PC Build: A Comprehensive Guide
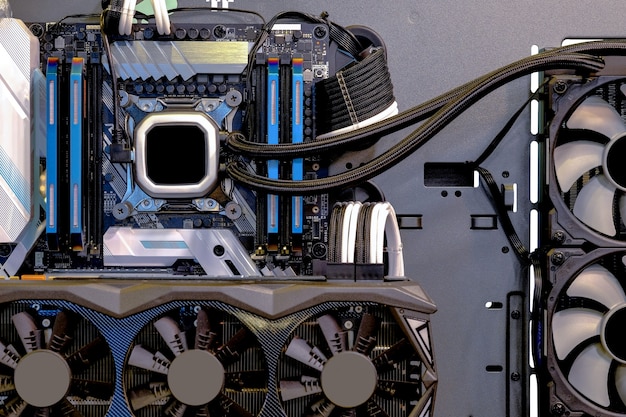
Installing Windows 11 on your new gaming PC build involves several steps, from preparing a bootable USB drive to configuring BIOS settings and completing the installation process, ensuring your system is ready for optimal gaming performance.
So, you’ve finally assembled your dream gaming rig, a testament to late nights researching components and meticulous cable management. But a beastly machine is nothing without its operating system. Let’s walk you through how to install Windows 11 on your new gaming PC build, making sure you’re ready to dive into your favorite games with the latest features and performance enhancements.
Prepare for Windows 11 Installation
Before diving into the installation process, preparation is key. This involves checking compatibility, gathering necessary tools, and creating a bootable USB drive.
Check Compatibility
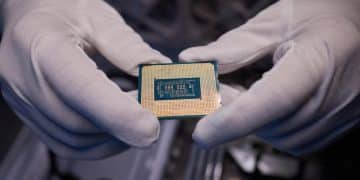
Ensure your components are Windows 11 compatible. The minimum requirements include a 1 GHz or faster processor with two or more cores on a compatible 64-bit processor or System on a Chip (SoC), 4 GB of RAM, 64 GB or larger storage device, UEFI secure boot capable, and a Trusted Platform Module (TPM) version 2.0. Most modern gaming components should meet these requirements, but it’s always wise to double-check the specifications of your CPU, motherboard, and other hardware.
Gather Necessary Tools
You’ll need a few essential items to get started.
- A USB drive with at least 8 GB of storage.
- A stable internet connection to download the Windows 11 installation media.
- Your Windows 11 product key (if you have one).
- Access to another computer to create the bootable USB drive.
Create a Bootable USB Drive
Creating a bootable USB drive is a crucial step. Here’s how:
- Download the Media Creation Tool from the official Microsoft website.
- Run the Media Creation Tool and accept the license terms.
- Select “Create installation media (USB flash drive, DVD, or ISO file) for another PC.”
- Choose the language, edition (Windows 11), and architecture (64-bit).
- Select “USB flash drive” as your media.
- Choose the USB drive you want to use and wait for the tool to download and create the bootable media.
Once the process is complete, you’ll have a bootable USB drive ready to install Windows 11.
Ensuring compatibility, gathering the right tools, and properly creating your bootable USB drive sets the stage for a smooth and successful Windows 11 installation.
Configure BIOS Settings
Configuring BIOS settings is an essential step to ensure your new gaming PC boots from the USB drive and is set up for optimal performance.
Accessing the BIOS
To access the BIOS, you usually need to press a specific key during startup. Common keys include Delete, F2, F12, or Esc. The correct key is typically displayed on the boot screen. If you’re unsure, consult your motherboard’s manual for the correct key.
Boot Order
Once in the BIOS, navigate to the boot options. Here, you’ll need to set the USB drive as the primary boot device. This ensures that your computer boots from the USB drive containing the Windows 11 installation files instead of the hard drive.
- Look for a section labeled “Boot Order,” “Boot Sequence,” or something similar.
- Use the arrow keys to move the USB drive to the top of the list.
- Save the changes and exit the BIOS. The exact steps may vary depending on your motherboard, so refer to your motherboard manual if needed.
Enable TPM and Secure Boot
Windows 11 requires TPM 2.0 and Secure Boot for security reasons. Ensure these features are enabled in the BIOS.
- Look for TPM settings, often found in the “Security” or “Advanced” sections of the BIOS. Enable TPM if it’s disabled.
- Find Secure Boot settings, usually located in the “Boot” or “Security” sections. Enable Secure Boot if it isn’t already.
These settings are crucial for a successful Windows 11 installation and to take advantage of its security features.
Properly configuring your BIOS settings, including setting the correct boot order and enabling TPM and Secure Boot, ensures a smooth installation process and maximizes the security of your gaming PC.
Start the Windows 11 Installation
With the BIOS settings configured, you’re ready to start the Windows 11 installation. This involves booting from the USB drive and following the on-screen prompts.
Boot from USB
After saving the BIOS settings and exiting, your computer should automatically reboot. If you’ve set the USB drive as the primary boot device, it will boot from the USB drive. If not, you may need to manually select the USB drive from the boot menu, which is typically accessed by pressing F11, F12, or Esc during startup (the key varies depending on the motherboard).
Follow On-Screen Prompts
Once the computer boots from the USB drive, the Windows 11 installation process will begin. Follow the on-screen prompts to proceed.
- Select your language, time and currency format, and keyboard or input method.
- Click “Next” to continue.
Start Installation
On the next screen, click “Install now” to start the installation process.
- Accept the license terms after reading them carefully.
- Choose the type of installation you want. For a new build, select “Custom: Install Windows only (advanced).”
This ensures you perform a clean installation on your new gaming PC, which is recommended for optimal performance.
Booting from the USB drive and carefully following the on-screen prompts is key to initiating the Windows 11 installation process successfully.
Partitioning and Formatting Drives
Partitioning and formatting drives is a critical step to ensure Windows 11 has the proper space and configuration for installation.
Selecting a Drive
In the custom installation screen, you’ll see a list of available drives. If you have a new SSD or NVMe drive, it will appear as unallocated space. Select the drive on which you want to install Windows 11.
Creating Partitions
If the drive is unallocated, you’ll need to create partitions.
- Click “New” to create a new partition.
- Enter the size of the partition you want to create. For the primary partition where Windows 11 will be installed, it’s recommended to allocate a significant portion of the drive, such as 200-300 GB.
- Click “Apply.” Windows may create additional partitions for system files and recovery purposes.
Formatting the Partition
After creating the partition, select it and click “Format.” This will erase any existing data on the partition and prepare it for Windows 11 installation.
- Confirm the formatting process and wait for it to complete.
Once the partition is formatted, select it and click “Next” to begin installing Windows 11 on the selected partition.
Properly partitioning and formatting your drive ensures Windows 11 has the necessary space and configuration for optimal performance.
Complete the Installation Process
After partitioning and formatting, the actual installation of Windows 11 begins. This process involves copying files, installing features, and configuring settings.
Copying Files
Windows 11 will now begin copying files to the selected partition. This process may take some time, depending on the speed of your drive and the performance of your PC.
- Do not interrupt the installation process. Let it run until it completes.
Installing Features and Updates
After copying files, Windows 11 will install features, updates, and drivers. Your computer may restart several times during this process.
- Again, do not interrupt the installation. Let the process run automatically.
Setting Up Your Account
Once the installation is complete, Windows 11 will guide you through the initial setup process.
- Select your region and keyboard layout.
- Connect to a network (Wi-Fi or Ethernet).
- Choose whether to set up for personal use or organizational use. For gaming, select “personal use”.
- Sign in with a Microsoft account or create one if you don’t have one.
- Configure privacy settings according to your preferences.
Completing these steps will finalize the installation and prepare your gaming PC for its first use.
Allowing the system to complete the installation to the end is vital. Carefully follow the steps when setting up your account. This ensures Windows 11 is installed correctly, and that your system functions smoothly.
Post-Installation Tasks
After Windows 11 is installed and set up, there are several post-installation tasks to ensure your gaming PC is optimized and secure.
Install Drivers
Install the latest drivers for your hardware components, including your graphics card, motherboard, audio devices, and network adapters.
- Download drivers from the manufacturers’ websites.
- Install the drivers in the correct order. Typically, start with the motherboard chipset drivers, followed by the graphics card drivers, audio drivers, and network drivers.
- Restart your computer after installing each set of drivers.
Update Windows
Check for and install any available Windows updates to ensure you have the latest security patches and system improvements.
- Go to Settings > Windows Update and click “Check for updates.”
- Install any available updates and restart your computer if prompted.
Install Essential Software
Install essential software for gaming, such as Steam, Discord, and any other gaming platforms you use.
- Download the installers from the official websites.
- Install the software and configure it according to your preferences.
Performing these post-installation tasks ensures. It also ensures that your gaming PC is up-to-date, secure, and ready for gaming.
By installing the latest drivers, updating Windows, and configuring essential software, you’ll create a stable, secure, and high-performing gaming environment.
Optimize Windows 11 for Gaming
To get the best gaming experience on Windows 11, you can optimize various settings to improve performance and reduce latency.
Enable Game Mode
Game Mode prioritizes system resources for gaming when a game is running.
- Go to Settings > Gaming > Game Mode and turn it on.
Adjust Visual Effects
Reduce visual effects to improve performance, especially on lower-end systems.
- Type “Adjust the appearance and performance of Windows” in the search bar and open the settings.
- Select “Adjust for best performance” or customize the visual effects to your liking.
Disable Startup Programs
Disable unnecessary startup programs to reduce boot time and free up system resources.
- Open Task Manager (Ctrl+Shift+Esc) and go to the “Startup” tab.
- Disable any programs that you don’t need to run at startup.
If you follow these tips, you can greatly improve your Windows 11 and gaming experience. This helps make your system faster, more responsive, and optimized for gaming.
Enabling Game Mode, adjusting visual effects, and disabling unnecessary startup programs ensures that your gaming PC runs smoothly and efficiently.
| Key Point | Brief Description |
|---|---|
| 🛠️ Compatibility Check | Ensure your hardware meets Windows 11 minimum requirements. |
| 💾 Bootable USB | Create a bootable USB drive using the Media Creation Tool. |
| ⚙️ BIOS Configuration | Set USB as primary boot, enable TPM and Secure Boot. |
| 🎮 Game Mode | Enable Game Mode in settings to optimize performance. |
[Título da seção FAQ em en-US]
▼
Windows 11 requires a 1 GHz or faster processor with two or more cores, 4 GB of RAM, 64 GB of storage, UEFI secure boot capable, and TPM 2.0. Ensure your gaming PC meets these requirements before installing.
▼
Download the Media Creation Tool from Microsoft’s website, run the tool, and follow the prompts to create a bootable USB drive. You will need a USB drive with at least 8 GB of space.
▼
To access BIOS, restart your computer and press the designated key repeatedly during startup (Del, F2, F12, or Esc). The key varies by motherboard, so consult its manual if unsure.
▼
TPM 2.0 (Trusted Platform Module) is a security requirement for Windows 11, enhancing the system’s security features and protecting against vulnerabilities.
▼
Install the latest drivers for your hardware, update Windows, and install essential software like Steam and Discord. Enable Game Mode to optimize the system for gaming.
[Título da Conclusão em en-US]
Installing Windows 11 on your new gaming PC build is a straightforward process if you follow these steps carefully. From preparing the bootable USB drive and configuring BIOS settings, to partitioning drives and optimizing the system for gaming, each step is vital for a smooth and successful installation. With Windows 11 properly installed and optimized, you’ll be ready to enjoy the latest games with the best possible performance.
