Troubleshooting Common Gaming PC Build Problems: A Step-by-Step Guide
Building a gaming PC can be exciting, but encountering issues is common; this guide provides a step-by-step approach to troubleshooting frequent problems like no display, boot failures, overheating, and more, ensuring a smooth and successful build.
Building your own gaming PC is a rewarding experience, but it’s not always smooth sailing. Many builders, from beginners to experienced enthusiasts, encounter snags along the way. If you’re facing issues, don’t panic! This guide offers a **troubleshooting common gaming PC build problems: a step-by-step guide** to help you diagnose and resolve the most frequent issues, ensuring your dream machine comes to life.
Common Issues During the Initial Build Phase
The initial build phase is where many first-time PC builders encounter their first hurdles. Identifying problems early can save you time and frustration in the long run. Let’s delve into some common issues that arise during this critical stage.
Incompatible Components
One of the most frequent pitfalls is selecting parts that aren’t compatible. This could stem from mismatched sockets (CPU and motherboard), incorrect RAM type (DDR4 vs. DDR5), or insufficient power supply wattage.
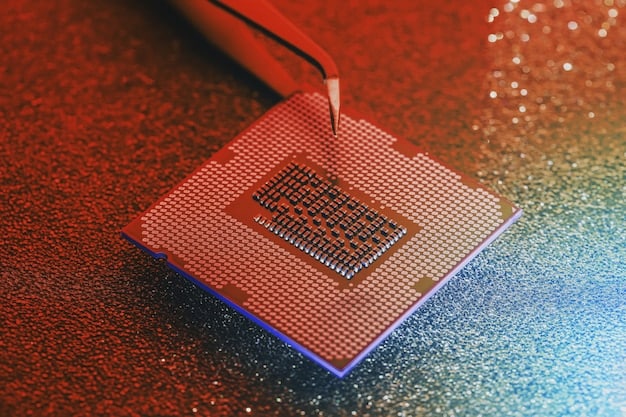
CPU Installation Problems
Installing the CPU incorrectly can lead to bent pins or improper contact with the cooler. This can cause the system to fail to boot or overheat rapidly.
- Double-check compatibility: Use PCPartPicker or a similar tool to verify that all chosen components are compatible.
- Handle the CPU with care: Avoid touching the pins and align the CPU correctly with the socket markings.
- Apply thermal paste appropriately: Use a small, even amount of thermal paste for optimal heat transfer.
Thoroughly inspecting the components for compatibility and carefully handling sensitive parts like the CPU can prevent these issues from derailing your build early on. Avoiding rushed steps is crucial; confirm each part fits into its intended location before proceeding.
By addressing these common issues during the initial build phase, you can significantly increase your chances of a successful gaming PC build.
Power Supply Problems: The System Won’t Turn On
A dead system is one of the most disheartening sights for a new PC builder. Often, the culprit lurks within the power supply. Let’s tackle the potential power-related problems and how to diagnose them.
Power Supply Isn’t Switching On
If you press the power button and nothing happens, it could be a simple switch issue or a more complex power supply failure.
Insufficient Wattage
Sometimes the PSU might be turning on, but not providing enough power for all the components. This can lead to instability, random shutdowns, or failure to boot.
- Check the power switch: Ensure the power switch on the back of the PSU is in the “on” position.
- Test the outlet: Plug another device into the outlet to confirm it’s working.
- Verify PSU connections: Ensure all PSU cables are securely connected to the motherboard, GPU, and other components.
Making sure the PSU is adequately powered and correctly connected is essential for a functioning system. Calculate total power draw and always leave some headroom to prevent this particular problem. An overloaded PSU can lead to hardware damage, so prevention is key.
Resolving power supply issues often involves methodical checking and ensuring proper connections. By taking these steps, you’ll have a much better chance of getting your system powered up properly.
No Display Output: Troubleshooting Graphics Card and Monitor Issues
Seeing nothing on your monitor after powering up your PC can be unsettling. This often points to issues with either the graphics card, the monitor, or the connection between them. Let’s explore common causes and solutions.
Graphics Card Not Seated Properly
If the graphics card isn’t fully seated in the PCIe slot, it won’t be able to communicate with the motherboard, resulting in no display output.
Incorrect Monitor Connection
Connecting the monitor to the wrong port or using a faulty cable can also prevent the display from working.
- Reseat the graphics card: Power down the system, remove the graphics card, and firmly reinsert it into the PCIe slot.
- Check monitor connections: Ensure the monitor is plugged into the graphics card and not the motherboard’s onboard video output (unless you are troubleshooting without a dedicated GPU).
- Try a different cable: Test with a different HDMI or DisplayPort cable.
A common oversight is forgetting to remove protective covers from the graphics card’s connectors. Ensure these are removed before attempting to connect the monitor.
Diagnosing and resolving display output issues requires careful inspection and testing. These tips will help you get your visuals up and running correctly, turning that blank screen back into a portal to your gaming world.
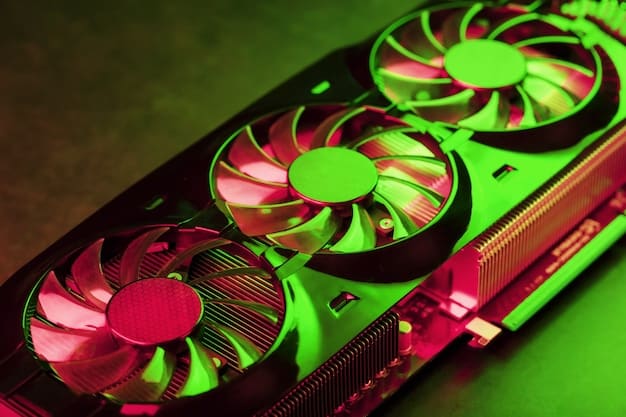
Overheating Problems: CPU and GPU Temperature Control
Overheating components can lead to performance throttling, system instability, and even hardware damage. Keeping your CPU and GPU cool is essential for a reliable gaming PC.
Insufficient Cooling
Stock coolers or improperly installed aftermarket coolers may not provide adequate cooling for high-performance CPUs and GPUs, especially during gaming sessions.
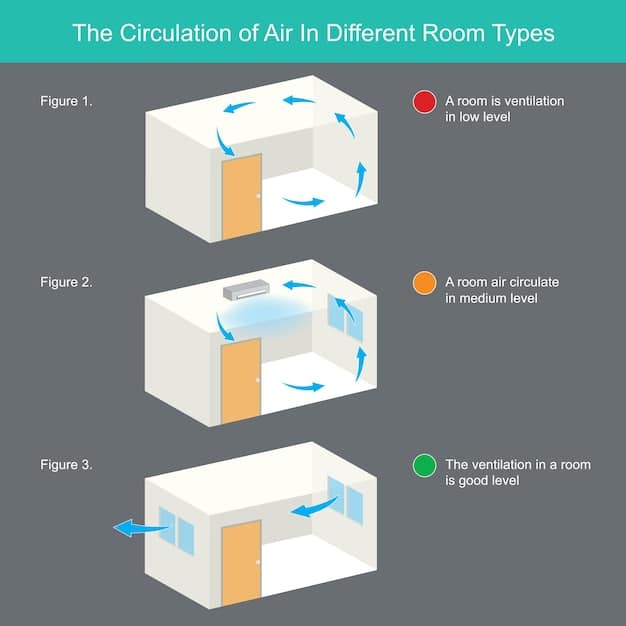
Poor Case Airflow
Limited or obstructed airflow within the case can trap heat around components, leading to increased temperatures.
Using temperature monitoring software can help you diagnose and address overheating problems. Programs like HWMonitor or MSI Afterburner can provide real-time temperature readings for your CPU and GPU.
- Upgrade the CPU cooler: Consider an aftermarket cooler with better heat dissipation capabilities.
- Improve case airflow: Add more case fans and ensure they are properly oriented for intake and exhaust.
- Reapply thermal paste: Remove and replace the thermal paste on the CPU and GPU to ensure good contact with the cooler.
Regular cleaning of dust buildup can also assist in temperature control. Dust acts as an insulator, trapping heat and reducing the effectiveness of cooling solutions.
Addressing overheating problems proactively will safeguard your components and maintain optimal performance. By implementing these cooling solutions, you can keep your system running smoothly, even under heavy gaming loads.
RAM Issues: System Instability and Boot Failures
Random Access Memory (RAM) is crucial for system performance and stability. Problems with RAM configuration or faulty modules can lead to various issues. Let’s look at identifying and fixing RAM-related problems.
Incorrect RAM Installation
RAM modules must be installed in the correct slots to enable dual-channel or quad-channel memory configurations. Improper installation can limit performance or prevent the system from booting.
Incompatible RAM Speed
Using RAM with a speed exceeding the motherboard’s and CPU’s rated support can lead to instability or boot failures.
- Check RAM seating: Ensure RAM modules are firmly seated in the correct slots as specified in the motherboard manual.
- Enable XMP profile: Enable the XMP (Extreme Memory Profile) in the BIOS to run the RAM at its advertised speed.
- Test RAM modules: Use a memory testing tool like Memtest86 to check for errors.
It’s a good idea to check the motherboard’s QVL (Qualified Vendors List) to ensure the RAM model is tested and compatible. This reduces the chances of incompatibility issues.
By correctly installing, configuring, and testing your RAM, you can ensure smooth and stable system performance. Proper RAM management is a critical component for a well-functioning gaming PC.
Storage Problems: HDD/SSD Detection and Boot Issues
Storage devices are fundamental for loading the operating system and storing game files. If your system isn’t detecting your hard drive or SSD, or if you’re unable to boot, here’s how to troubleshoot.
Incorrect SATA Connections
Improper SATA cable connections or disabled SATA ports in the BIOS can prevent the system from recognizing storage devices.
Boot Order Configuration
If the BIOS boot order is not set correctly, the system may attempt to boot from the wrong drive or fail to boot altogether.
- Check SATA cables: Ensure SATA cables are securely connected to both the motherboard and the storage devices.
- Enable SATA ports in BIOS: Verify that the SATA ports are enabled in the BIOS settings.
- Set correct boot order: Configure the BIOS to boot from the drive containing the operating system.
Sometimes the problem isn’t physical, but rather a driver issue. Ensure that the necessary drivers for your storage devices are installed, particularly if using NVMe SSDs, which often require specific drivers.
Ensuring proper storage device detection and boot configuration will help your system load the operating system correctly and access your games and files without issue. Paying attention to these details is key for a seamless gaming experience.
| Key Point | Brief Description |
|---|---|
| 🛠️ Component Compatibility | Ensure every part is compatible using tools like PCPartPicker. |
| ⚡Power Supply Checks | Verify the power switch, outlet, and all PSU connections. |
| 🌡️ Overheating Solutions | Upgrade CPU cooler, ensure airflow, and reapply thermal paste. |
| 💾 Storage Detection | Check SATA connections, BIOS settings, and boot order. |
Frequently Asked Questions
▼
Start by checking the power supply switch and the outlet. Ensure all power cables are securely connected inside the PC, particularly to the motherboard and the power supply itself. Verify your power supply unit (PSU) is sufficient for your system.
▼
Check your motherboard manual for the correct RAM slot configuration for dual or quad-channel mode. Ensure the RAM modules are firmly seated and the clips on the sides of the slots are locked in place. The system should then recognize all installed RAM.
▼
First, ensure your CPU cooler is properly installed with adequate thermal paste. Improve case airflow by adding more fans if necessary. Reconsider upgrading your CPU cooler to a more efficient model if issues persist due to inadequate cooling.
▼
Make sure the monitor cable is connected to the graphics card, not the motherboard (if you have a dedicated GPU). Reseat the graphics card in its slot and try a different video cable (HDMI or DisplayPort) if available. Confirm the monitor is set to the correct input.
▼
Check for overheating issues using monitoring software or test RAM using Memtest86. Also, ensure all drivers are up to date, especially for the graphics card and chipset. A corrupted operating system can also cause crashes & may require a reinstall.
Conclusion
Troubleshooting a gaming PC build can seem intimidating, but by following these steps and addressing common issues systematically, you can overcome most challenges. Remember to be patient, double-check every connection, and utilize online resources to guide you through the process. A successfully built and fully functional gaming PC is well worth the effort.


