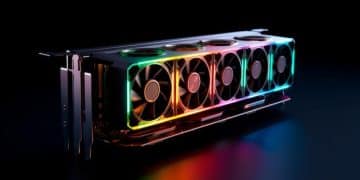
Overclock Your NVIDIA GPU: 2025’s Step-by-Step Guide
Overclocking your NVIDIA GPU in 2025 can significantly boost your gaming and creative performance by pushing its clock speeds beyond the manufacturer’s settings, but requires careful execution to ensure stability and prevent damage.
Ready to unlock hidden performance from your NVIDIA GPU in 2025? This step-by-step guide covers everything you need to know about safely and effectively overclocking your NVIDIA GPU: A Step-by-Step Guide for Achieving Stable Performance Gains in 2025.
Understanding NVIDIA GPU Overclocking
Overclocking is the process of increasing the clock speeds of your GPU beyond its factory settings. This essentially forces the GPU to work faster, resulting in improved performance in games, video editing, and other graphically intensive applications. But it’s crucial to understand the basics before you jump in.
What are Clock Speeds?
Clock speeds, measured in MHz, determine how fast your GPU processes information. Higher clock speeds generally translate to better performance but also increased heat and power consumption.
Why Overclock Your NVIDIA GPU?
The primary reason is to enhance performance without upgrading to a more expensive GPU. Overclocking can provide a noticeable frame rate boost in games or reduce rendering times in creative applications.
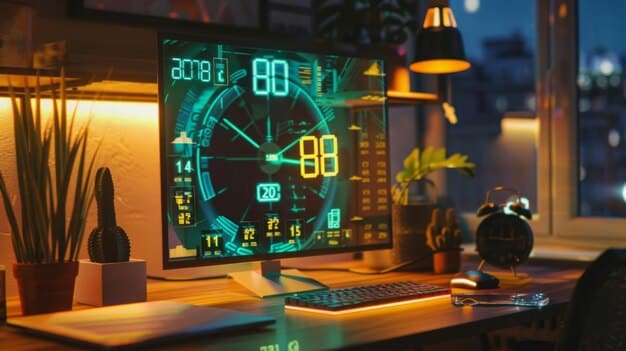
Key benefits include:
- Increased frame rates in games for a smoother gaming experience.
- Faster rendering and processing times for creative tasks.
- Extending the lifespan of your current GPU by maximizing its potential.
However, it is very important to be aware of the potential risks involved and proceed with caution, so you don’t damage your GPU.
In conclusion, understanding the fundamentals of clock speed and motivations is essential before embarking on your overclocking adventure.
Preparing Your System for Overclocking
Before you start overclocking, you need to prepare your system to ensure a safe and stable process. Adequate cooling, reliable power and the right software are all required for success.
Cooling Solutions
Overclocking generates more heat. Ensure your GPU has adequate cooling. Aftermarket coolers, such as liquid coolers or high-performance air coolers, are highly recommended.
Power Supply Unit (PSU)
Overclocking increases power consumption. Make sure your PSU has enough wattage to handle the increased load. A high-quality PSU with ample headroom is crucial for stability, calculate the total energy consumption, and add about 20% on top for proper measurements.
Monitoring Software
Download and install GPU monitoring software like MSI Afterburner or EVGA Precision X1. These tools allow you to adjust clock speeds, monitor temperatures, and perform stress tests.
Essential software includes:
- MSI Afterburner: A popular and versatile overclocking utility.
- EVGA Precision X1: Another great option, especially for EVGA GPUs.
- GPU-Z: Provides detailed information about your GPU.
In order to safely overclock your GPU, you need to verify these aspects of your system beforehand.
Step-by-Step Overclocking Guide
Now, let’s get into the step-by-step process of overclocking your NVIDIA GPU. Follow these steps carefully to achieve stable performance gains.
Step 1: Baseline Testing
Before making any changes, run a benchmark like Unigine Heaven or 3DMark to establish a baseline performance score. This will help you quantify the performance improvements from overclocking.
Step 2: Incrementally Increasing Clock Speeds
Gradually increase the core clock speed in small increments (e.g., 10-15 MHz). After each increment, run a stress test to check for stability. Look for artifacts, crashes, or freezes.
Step 3: Testing for Stability
Use stress-testing tools like FurMark or OCCT to push your GPU to its limits. Run these tests for at least 30 minutes to ensure stability. Monitor temperatures closely to prevent overheating.
Stress test tools:
- FurMark: A popular and demanding GPU stress test.
- OCCT: Comprehensive testing tool for CPU and GPU stability.
- 3DMark Time Spy Stress Test: A realistic gaming workload stress test.
Now it’s just a matter of incrementing the clock speed, testing for stability, and reapeating the process until you reach your goal.
Monitoring and Adjusting for Stability
Monitoring your GPU is key to optimizing the stability and performance of the overclocking adjustments. It’s very crucial to constantly monitor and adjust the clock speeds.
Temperature Monitoring
Keep an eye on your GPU temperature using monitoring software. Ideally, keep it below 80°C (176°F) during intense gaming or rendering. If it exceeds this limit, reduce the overclock or improve cooling.
Voltage Adjustments
Increasing voltage can help stabilize higher clock speeds, but it also generates more heat. Adjust voltage in small increments and monitor temperatures closely. Be extremely cautious when increasing voltage, as excessive voltage can damage your GPU.
Troubleshooting Common Issues
If you experience crashes, freezes, or artifacts, reduce the core clock and memory clock speeds. If the problems persist, lower the voltage or revert to the factory settings. A stable overclock is one that provides a good performance boost without compromising reliability.
Possible issues:
- Crashes: Usually indicate instability, reduce clock speeds.
- Artifacts: Visual glitches suggest memory overclock is too high.
- Overheating: Lower voltage, improve cooling, or reduce clock speeds.
Constant vigilance of all data related to your graphics card will let you adjust your new settings and keep your pc running smoothly.
Advanced Overclocking Techniques
Once you’re comfortable with the basics, you can explore more advanced overclocking techniques. This allows you to squeak out more performance, but they also come with increased risk.
Memory Overclocking
Increasing the memory clock speed can also improve performance, particularly in memory-intensive applications. However, memory overclocking can be more sensitive to instability, so proceed with caution.
Power Limit Adjustments
Increasing the power limit allows the GPU to draw more power, potentially enabling higher clock speeds. Make sure that your PSU is enough for the increased load. You can adjust the power limit in software like MSI Afterburner.
Custom Fan Curves
Creating a custom fan curve can help improve cooling performance by adjusting fan speeds based on temperature. A more aggressive fan curve can keep your GPU cooler under heavy load, but it may also increase noise levels.
Here are some key adjustment areas:
- Memory clock: Incremental increases, monitoring for artifacts.
- Power limit: Increases headroom for higher clock speeds.
- Fan curves: Custom profiles to optimize cooling.
It is very important to be careful while trying these advanced methods as instability and damage are more possible.
Overclocking in 2025: Future Trends
Looking ahead to 2025, several trends are shaping the future of GPU overclocking. We can expect new techniques, methods and software.
AI-Assisted Overclocking
AI is playing an increasingly important role in overclocking. AI-powered tools can automatically optimize clock speeds and voltage settings based on your specific hardware and workload, resulting in more efficient and stable overclocks.
Advanced Cooling Technologies
New cooling technologies, such as vapor chambers and liquid metal thermal interfaces, are enabling more aggressive overclocking. Next generation cooling solutions will likely be more efficient and effective.
Integrated Monitoring Systems
In the future, monitoring systems may be integrated directly into GPUs, providing real-time data on temperatures, voltages, and power consumption. This data can be used to fine-tune overclocking settings and prevent damage.
Emerging trends will enhance overall overclocking performance
- AI Optimization: Automatic tuning for ease of use.
- Advanced Cooling: Enhanced heat dissipation solutions.
- Integrated Systems: Real-time monitoring built into GPUs.
| Key Point | Brief Description |
|---|---|
| 🌡️ Temperature Monitoring | Keep GPU below 80°C; improve cooling if needed. |
| ⚡ Voltage Adjustments | Increase voltage carefully, monitoring for overheating. |
| 🔧 Stability Testing | Use FurMark or OCCT to ensure stability. |
| 🚀 Incremental Increases | Increase core clock gradually for stable performance. |
Frequently Asked Questions
What are the risks of overclocking?
▼
Overclocking can lead to overheating, instability, and potentially damage your GPU if not done correctly. Always monitor temperatures and voltages closely.
What software do I need to overclock my GPU?
▼
Popular software options include MSI Afterburner, EVGA Precision X1, and GPU-Z for monitoring. These tools allow you to adjust clock speeds and voltages.
How do I know if my overclock is stable?
▼
Run stress tests like FurMark or OCCT for at least 30 minutes. If you experience crashes, freezes, or artifacts, your overclock is not stable.
What should my GPU temperature be during overclocking?
▼
Ideally, keep your GPU temperature below 80°C (176°F) during intense gaming or rendering to prevent damage and ensure stability.
Can I overclock any NVIDIA GPU?
▼
Most modern NVIDIA GPUs can be overclocked, but some may have more overclocking potential than others. Check reviews and forums for specific models.
Conclusion
Overclocking your NVIDIA GPU can be a rewarding experience, providing noticeable performance gains in gaming and creative applications. By following this step-by-step guide and exercising caution, you can safely and effectively unlock the hidden potential of your GPU in 2025.


