Liquid Cooling Leaks: Your 2025 Guide to Preventing PC Disaster
Liquid cooling leaks can be devastating for a PC, but with proper installation, regular maintenance, and leak testing, you can significantly reduce the risk and protect your valuable components.
Is your custom PC build at risk? Liquid Cooling Leaks: How to Prevent Catastrophic PC Damage (Updated 2025 Guide) is essential reading for gamers and PC enthusiasts who rely on liquid cooling. Don’t let a leak ruin your expensive hardware—learn preventative measures now!
Understanding Liquid Cooling Systems
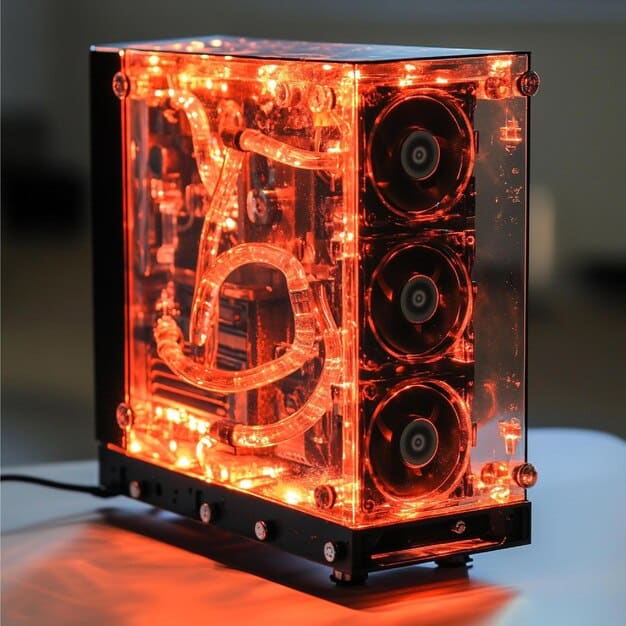
Liquid cooling systems offer superior thermal performance compared to traditional air coolers, allowing for quieter operation and higher overclocking potential. However, they also introduce the risk of leaks, which can cause significant damage to PC components. Understanding the components and how they work together is crucial for preventing issues.
Components of a Liquid Cooling System
A typical liquid cooling system consists of several key components:
- Coolant: A non-conductive fluid that circulates through the system to absorb and dissipate heat.
- Water Block: A component that sits on top of the CPU or GPU, transferring heat from the chip to the coolant.
- Pump: Circulates the coolant throughout the system.
- Radiator: Dissipates heat from the coolant into the air, often with the help of fans.
- Tubing: Connects all the components, allowing the coolant to flow between them.
- Reservoir: Holds extra coolant and helps remove air bubbles from the system.
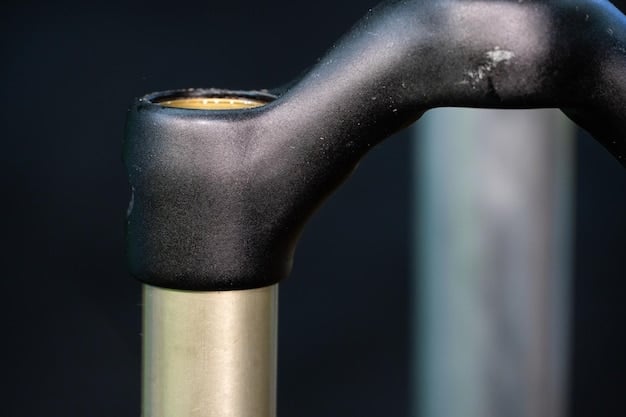
- Fittings: Connect the tubing to the various components and must be properly sealed to prevent leaks.
The Appeal of Liquid Cooling
Why do people choose liquid cooling despite the potential risks? While there’s a cost consideration, the benefits are appealing:
- Superior Cooling: Liquid cooling is more efficient at dissipating heat, allowing for lower temperatures under heavy loads.
- Overclocking Potential: Lower temperatures enable higher and more stable overclocks, improving performance.
- Quieter Operation: Liquid cooling systems can often operate more quietly than air coolers, especially under load.
- Aesthetics: Liquid cooling loops can be customized with different coolants, tubing, and lighting to create visually stunning builds.
Liquid cooling offers significant benefits in terms of performance and aesthetics, but it’s important to be aware of the potential risks and take precautions to prevent leaks. With the right knowledge and careful installation, you can enjoy the advantages of liquid cooling without the worry of catastrophic damage.
Identifying Potential Leak Sources
Pinpointing potential leak sources is the first step in preventing liquid cooling disasters. Many factors contribute to leaks, ranging from component quality to installation errors. Being able to identify these potential sources beforehand significantly reduces the odds that something will go wrong.
Common Culprits: Weak Points in the System
Certain components are more prone to leaks than others:
- Fittings: Poorly tightened or low-quality fittings are a prime source of leaks. Ensure all fittings are properly tightened and consider using high-quality compression fittings.
- Tubing: Cuts, kinks, or improper connections can lead to leakage. Use tubing that is compatible with your fittings and ensure it’s properly seated.
- Water Blocks: Cracks, manufacturing defects, or improper installation can cause leaks in water blocks. Inspect water blocks for any damage before installation and follow the manufacturer’s instructions carefully.
- Radiators: Impacts or corrosion can damage radiators, leading to leaks. Be careful when handling radiators and ensure they are properly protected from physical damage.
Age and Wear: The Gradual Decline
Over time, components can degrade, increasing the risk of leaks:
- Coolant Degradation: Coolant can break down over time, leading to corrosion and decreased performance. Change your coolant regularly according to the manufacturer’s recommendations.
- O-Rings and Seals: These can dry out, crack, or lose their elasticity over time, compromising their ability to seal properly. Inspect these regularly and replace them as needed.
- Pump Wear: A failing pump can put extra stress on the system, increasing the risk of leaks. Monitor your pump’s performance and replace it if it shows signs of failure.
Identifying potential leak sources early on allows for proactive measures, such as reinforcing vulnerable areas or replacing worn components. Regular inspections and maintenance can also help prevent leaks from occurring in the first place.
Proper Installation Techniques
Correct installation is critical for preventing liquid cooling leaks. Even the highest quality components can leak if they are not installed properly. Paying close attention to detail and following best practices is essential for a leak-free system.
Step-by-Step Installation Guide
Follow these steps for a proper liquid cooling installation:
- Read the Manual: Always consult the manufacturer’s instructions for each component.
- Prepare Your Components: Inspect all parts for damage and ensure you have all the necessary tools and materials.
- Install the Water Block: Carefully attach the water block to your CPU or GPU according to the manual. Ensure proper thermal paste application.
- Mount the Radiator: Secure the radiator in a suitable location in your case.
- Connect the Tubing: Cut and connect the tubing to the various components, ensuring proper length and secure connections.
- Fill the System: Slowly fill the system with coolant, taking care to remove any air bubbles.
- Leak Test: Before powering on your system, perform a thorough leak test to identify any potential leaks.
Ensuring Secure Connections
Properly secured connections are essential for leak prevention:
- Tighten Fittings Properly: Ensure all fittings are tightened to the correct torque. Overtightening can damage the threads, while undertightening can lead to leaks.
- Use Compression Fittings: These provide a more secure and reliable connection compared to barbed fittings.
- Check for Kinks: Ensure that the tubing is not kinked or bent excessively, as this can restrict flow and put stress on the connections – kinking reduces the cooling ability.
- Proper Tube Insertion: Make sure the tubing is fully seated on the fittings.
Proper installation is a key factor in preventing leaks in liquid cooling systems. Taking your time and paying attention to detail can save you from potential headaches down the road. Always refer to the manufacturer’s instructions and double-check all connections before powering on your system.
Leak Testing Procedures
Before powering on your new or modified water-cooled PC, a thorough leak test is crucial. This process can save you from catastrophic damage caused by coolant spills. Effective leak testing involves methodical examination and patience.
Methods for Effective Leak Detection
There are several methods for leak testing, varying in complexity and effectiveness:
- Paper Towel Test: Place paper towels around all fittings and connections. After several hours, check the towels for any signs of moisture.
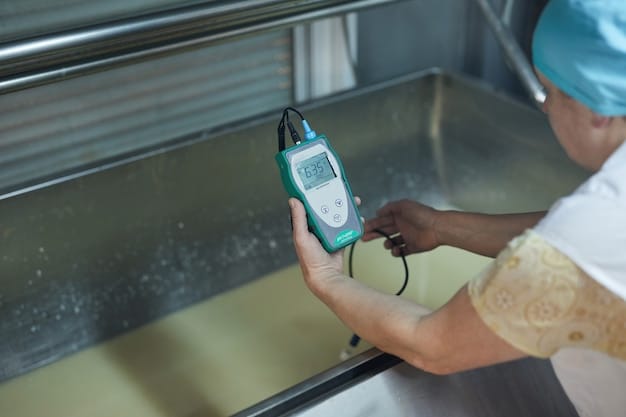
- Air Leak Tester: A specialized tool that pressurizes the loop with air, allowing you to check for leaks by monitoring the pressure.
- Visual Inspection: Carefully examine all components and connections for any signs of leaks. Use a flashlight to check hard-to-reach areas.
Tools for Leak Testing
Having the right tools can make the leak testing process more efficient:
- Paper Towels: Essential for detecting small leaks.
- Flashlight: Helps to inspect hard-to-reach areas.
- Air Leak Tester: A specialized tool for pressurizing the loop with air.
- Leak Detector Fluid: A non-conductive fluid that can be used to identify leaks.
Duration and Best Practices
Allow the PC to sit to ensure there are no leaks that slowly drip – doing this overnight is the best way to test.
- Start Slow: Begin by filling the loop slowly to allow air to escape and prevent pressure buildup.
- Run the Pump: Turn on the pump at a low speed to circulate the coolant and check for leaks.
- Inspect Regularly: Check all connections and components regularly for any signs of leaks.
- Be Patient: Allow the system to run for at least 24 hours to ensure there are no slow leaks.
Leak testing is a vital step in the liquid cooling installation process. By following these methods and best practices, you can minimize the risk of leaks and protect your PC from potential damage. Patience and attention to detail are key to a successful leak test.
Regular Maintenance and Monitoring
Even after successful installation and leak testing, regular maintenance is crucial for long-term reliability. Regular monitoring of temperatures and coolant levels helps prevent unexpected issues and extends the lifespan of your liquid cooling system.
Monitoring Temperatures and Coolant Levels
Keep an eye on these critical parameters:
- CPU and GPU Temperatures: Use monitoring software to track temperatures under load. High temperatures can indicate a problem with the cooling system.
- Coolant Level: Check the coolant level in the reservoir regularly. A significant drop in coolant level can indicate a leak or evaporation.
Maintenance Checklist: Keeping Things in Check
Perform these maintenance tasks regularly:
- Inspect for Leaks: Visually inspect all components and connections for any signs of leaks regularly.
- Clean the Radiator: Dust buildup on the radiator can reduce its cooling efficiency. Clean the radiator regularly with compressed air or a soft brush.
- Check Tubing: Inspect the tubing for kinks, cracks, or discoloration. Replace the tubing if it shows signs of wear.
- Change Coolant: Replace the coolant every 6-12 months, depending on the manufacturer’s recommendations.
Preventative Measures for Long-Term Reliability
Take these steps to ensure the longevity of your system:
- Use High-Quality Coolant: Use coolant specifically designed for liquid cooling systems to help prevent corrosion and buildup.
- Avoid Mixing Metals: Mixing metals in the loop can lead to galvanic corrosion. Use components made from the same metal to avoid this issue.
- Monitor Pump Performance: Listen for any unusual noises from the pump, which could indicate a problem.
- Keep the System Clean: Keep the inside of your case free from dust and debris to help improve airflow and cooling efficiency.
Regular maintenance and monitoring are essential for maintaining a reliable liquid cooling system. By keeping an eye on temperatures, coolant levels, and performing routine maintenance tasks, you can prevent leaks and ensure the long-term performance of your system. Being proactive is half the battle.
Responding to a Leak: Emergency Procedures
Even with the best preventative measures, leaks can still occur. Knowing how to respond quickly and effectively can minimize damage and prevent further issues. Acting fast can be the difference between a minor inconvenience and a total loss.
Immediate Actions to Take
If you detect a leak, take these steps immediately:
- Power Off the System: Immediately shut down the PC to prevent electrical damage.
- Disconnect Power: Unplug the power cord from the wall to ensure the system is completely powered off.
- Assess the Damage: Identify the source of the leak and assess the extent of the damage.
- Contain the Spill: Use paper towels or cloths to absorb any spilled coolant.
Cleaning and Drying Affected Components
Thoroughly cleaning and drying affected components is crucial:
- Remove Components: Carefully remove any components that have been exposed to coolant.
- Clean with Isopropyl Alcohol: Use isopropyl alcohol to clean the affected areas, removing any residue.
- Dry Thoroughly: Allow the components to dry completely before reinstalling them. Use a fan or compressed air to speed up the drying process.
Preventing Future Leaks
Once the immediate crisis is over, take steps to prevent future leaks:
- Identify the Cause: Determine what caused the leak in the first place. Was it a loose fitting, a damaged component, or something else?
- Replace Faulty Components: Replace any components that were damaged or contributed to the leak.
- Reinforce Connections: Use better fittings or reinforce connections to prevent future leaks.
Responding quickly and effectively to a leak is crucial for minimizing damage. By taking immediate action, thoroughly cleaning and drying affected components, and taking steps to prevent future leaks, you can protect your PC and ensure its long-term reliability. Keep these steps in mind so that you’re prepared for the possibility of disaster.
| Key Point | Brief Description |
|---|---|
| 💧 Leak Sources | Fittings, tubing, and water blocks are common leak points. Regular inspection can prevent issues. |
| 🛠️ Installation | Proper installation is critical. Follow the manufacturer’s instructions and ensure secure connections. |
| 🧪 Coolant | Change the coolant every 6-12 months. Use high-quality coolant designed for liquid cooling systems. |
| 🚨 Emergency | Power off immediately, disconnect the power, and clean affected components with isopropyl alcohol. |
FAQ
▼
You should typically change your liquid cooling coolant every 6-12 months. Refer to the coolant manufacturer’s recommendations for specific intervals.
▼
Common signs include visible coolant droplets, a sweet or chemical smell, and a drop in coolant levels in the reservoir.
▼
No, avoid mixing different metals! This can cause galvanic corrosion, which can damage components and lead to leaks.
▼
Use a non-conductive coolant specifically designed for PC liquid cooling systems. Avoid using automotive antifreeze, as it can damage components.
▼
Check your local regulations for proper disposal methods. Many coolants contain chemicals and should not be poured down the drain.
Conclusion
Preventing liquid cooling leaks is essential for maintaining a reliable and high-performing PC. By understanding potential leak sources, employing proper installation techniques, conducting thorough leak tests, and performing regular maintenance, you can minimize the risk of catastrophic damage and enjoy the benefits of liquid cooling with peace of mind.


